1111 Busch Pkwy, Buffalo Grove, IL 60089, USA

1 (833) PPC-FLEX

How to Choose Printed Stand Up Pouches?

Choosing printed stand up pouches starts with the product, not the artwork. A pouch for roasted coffee needs different protection from one for dry snacks. The right structure helps preserve freshness, stands steadily on a shelf, and opens without frustrating customers. Small details matter. A zipper can feel reassuring; a weak bottom gusset can undermine the display.

Packaging educator Walter Soroka’s product-focused approach offers a useful principle, paraphrased here: “Choose the pouch around the product and process, not artwork alone.” Treat that as a guide, not a universal rule. Check product weight, moisture and oxygen sensitivity, filling temperature, sealing method, and shipping conditions. Ask your supplier for material specifications and barrier data. Then test filled samples on your actual production line. A beautiful mock-up proves very little.

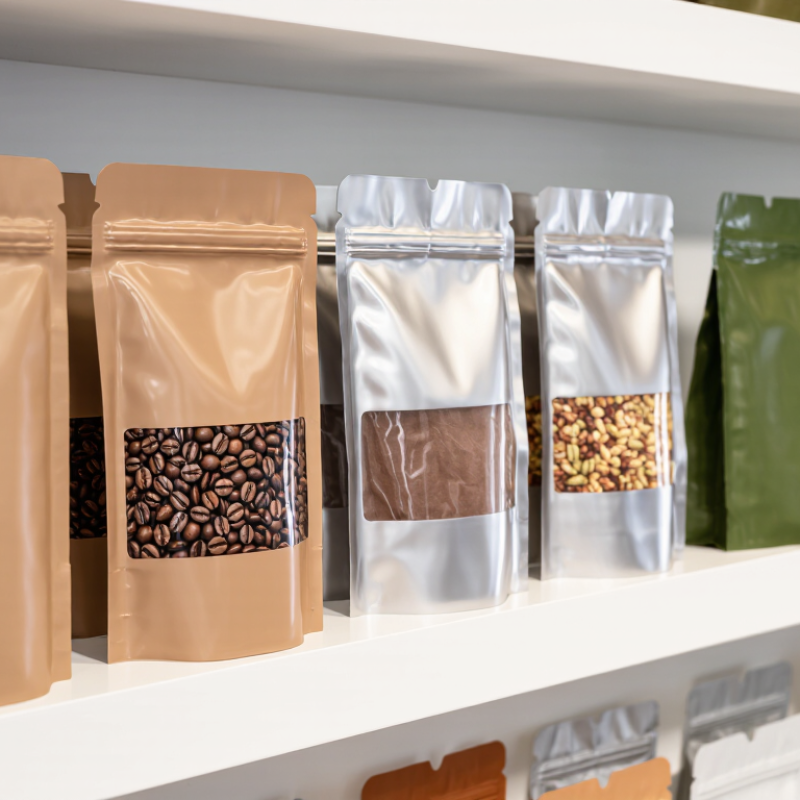
Printed stand up pouches also need readable branding, suitable finishes, and dimensions that fit the shelf. Compare matte and gloss samples under store lighting. Inspect small text and color consistency. Request samples. Run seal, drop, and shelf tests that reflect real handling. If a pouch works only in a photo, reconsider it. This guide explores how to balance protection, appearance, usability, and cost. Trade-offs remain. A heavier material may provide more protection but use more resources; a lower-cost option may need closer testing. There is no perfect pouch, only a considered choice for your product and customers.
How to Choose Printed Stand Up Pouches?

Identify the Product, Its Contents, and Packaging Requirements

Choosing a printed stand up pouch starts with the product, not the artwork. Is it a fine powder, crisp snack, dried ingredient, or pourable sauce? Each behaves differently during filling and storage. Small particles can collect near the seal. Oily foods may need stronger resistance to grease. Moisture-sensitive contents often require a suitable barrier layer.

Then check what the contents need protection from. Oxygen can affect freshness, while light may change color or flavor. A transparent window offers a product view, but it can reduce protection. Worth questioning. Match the pouch structure to the product’s expected shelf life and storage conditions, and confirm the choice with packaging or materials specialists. A printed sample alone cannot show barrier performance.

Packaging requirements matter just as much. Note the fill weight, pouch dimensions, filling temperature, sealing method, and whether customers need a resealable zipper. A pouch that stands neatly on a shelf may still be awkward on a filling line. Check seal strength and fit using the actual product, not just an empty sample. Also consider shipping: sharp edges, settling contents, or repeated handling can stress the package. Some details may change after testing. That is a reason to revise the specification, not to guess.
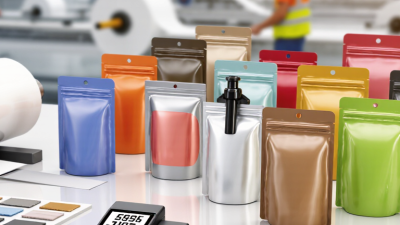
Select Pouch Materials and Barrier Properties

When choosing printed stand up pouches, match the material structure to the product’s actual risks. A dry snack may need protection from moisture and oxygen, while a product sensitive to light may also need an opaque layer. PET often provides a smooth surface for sharp printing, while PE or CPP commonly forms the heat-sealable inner layer. The exact structure depends on the filling process and seal requirements.

Small details matter.

Barrier options include metallized films, aluminum foil, and special polymer layers such as EVOH. Each has trade-offs in protection, flexibility, appearance, and disposal.

A strong barrier is not automatically the best choice. It may add cost or complicate recycling, while a pouch with too little protection can lose product quality during storage. Ask suppliers for oxygen and water-vapor transmission data, then compare it with the product’s expected shelf life and storage conditions.

Check the seal area, too; powder or oil near the seal can weaken closure performance. Printed layers should also be protected within the laminate so handling does not scuff the design.

Test filled pouches under realistic transport and storage conditions. A specification can look right on paper, yet still need adjustment after testing.

Choose the Pouch Size, Shape, and Functional Features

How to Choose Printed Stand Up Pouches?

Choose the Pouch Size, Shape, and Functional Features

Choose pouch size around the product’s real fill volume, not just its weight. A kilo of granola needs more room than a kilo of dense powder. Leave enough headspace for sealing, but avoid excess air that lets the contents shift. Measure a typical serving and test a filled sample on a shelf. A flat mockup can be misleading.

Shape affects both storage and handling. A wide base can help a pouch stand steadily, while a narrow profile may fit crowded shelves better. Consider how customers will pour or scoop the product. Features matter, too: zippers suit products opened repeatedly, and tear notches can make first opening easier. For oily or moisture-sensitive contents, ask the packaging supplier which material structure and seal options are appropriate. Printed colors may also look different on flexible film than on a screen, so review a physical proof.

Tips: Fill and seal a sample pouch, then set it upright, open it, and pour from it. Check for leaks and awkward handling. Small test runs can reveal problems that drawings miss. Even then, one size may not suit every use.

Plan the Printed Design and Required Label Information

Plan the artwork around the information customers need to find quickly. Give the product name clear space near the top, then organize ingredients, net quantity, storage directions, and contact details into readable blocks. If the product requires allergen or nutrition information, reserve room for it before approving the design. Requirements vary by product and sales region, so verify the current rules with a qualified labeling professional.

Check the pouch at its actual size, not only on a large screen. Small type can disappear around a gusset or beneath a seal. Keep essential text away from folds, seams, and tear notches, and use strong contrast between letters and background. A barcode needs a flat, uncluttered area. Leave space for variable details, such as a lot code or best-by date, if they will be printed later.

Request a physical proof when possible. Read it under ordinary shop lighting, and check that the smallest text stays sharp after printing. A mockup may look polished yet feel crowded in hand; that is useful feedback, not a reason to squeeze in more copy. Small details matter. Keep decoration secondary to clear, accurate information.

How to Choose Printed Stand Up Pouches?

Plan the Printed Design and Required Label Information

This example checklist groups three design items on the front panel—product identity, net quantity, and claims—and seven information items on the back panel—ingredients, allergen information, nutrition information, business details, storage instructions, preparation instructions, and barcode. Requirements vary by product and market, so verify applicable labeling rules before printing.

Compare Suppliers, Samples, and Quality Standards

Choosing printed stand-up pouches starts with comparing suppliers beyond the quoted price. Ask for pouch dimensions, material structure, minimum order quantity, setup costs, and production lead time in writing. Check whether the supplier can explain how each layer protects your product. Clear answers matter. Vague claims are a reason to pause.

Request samples made with the proposed materials and print method. Fill one with your product, then check the seal, zipper, base stability, and ease of opening. Look closely at color consistency and small text. Ask for material thickness, barrier test data, and quality inspection details. For food packaging, request documentation suited to your product and sales market. A sample can look perfect but still reveal weak seals after handling; I have learned not to judge from appearance alone.

Tips: Compare samples side by side under the same light. Photograph defects, record measurements, and keep one approved sample as a reference. Confirm how problems are handled before placing a large order. Even careful checks can miss something.

How to Choose Printed Stand Up Pouches? - Compare Suppliers, Samples, and Quality Standards

Use this checklist to compare suppliers on the same pouch specification. Set acceptance limits in writing before ordering; requirements vary by product, filling process, destination market, and packaging structure.

Evaluation Area What to Compare Evidence or Sample Check Practical Acceptance Guidance
Structure and product fit Layer materials, total thickness, barrier needs, pouch dimensions, zipper, and any required spout or tear notch. Written structure specification; confirm material suitability for the product, filling temperature, and storage conditions. Do not select a structure by appearance alone. Confirm compatibility and required oxygen, moisture, light, or aroma protection with the supplier and product team.
Food-contact documentation Applicable requirements for the destination market and intended use. Request a material declaration and supporting compliance documentation for the actual structure and use conditions. For the United States, food-contact materials must comply with applicable FDA requirements. In the European Union, Regulation (EC) No 1935/2004 and GMP Regulation (EC) No 2023/2006 are relevant. Applicability depends on the materials and use; ask for documentation rather than assuming a generic certificate is sufficient.
Print method and artwork Digital or gravure printing, color matching process, print position, finish, and artwork change flexibility. Review a printed proof or production-representative sample; check small text, barcodes, registration, and color under consistent lighting. Agree on the approved artwork, color reference, and any color-difference tolerance before production. A numerical color tolerance should be mutually specified, not assumed to be universal.
Supplier quality system Documented inspection, traceability, nonconformance handling, and change control. Review relevant quality-system documents, sample inspection records, and the process for notifying customers of material or process changes. ISO 9001 certification concerns a quality management system; it does not by itself certify a pouch as food-safe or prove that a particular order meets its specification.
Sample representativeness Whether samples use the proposed material structure, print process, closure, and dimensions. Request both a blank structural sample and a printed sample where possible. Confirm whether samples are prototypes or production-line samples. Use production-representative samples for final approval. A digitally printed mock-up may not represent the color, finish, or construction of a different production process.
Seal and closure performance Top seal, side seals, zipper function, and compatibility with the filling and sealing equipment. Inspect seals for channels, wrinkles, contamination, and incomplete bonding; test opening and reclosing of the zipper. Set test conditions and acceptance limits with the supplier. ASTM F88/F88M describes a method for measuring seal strength; it does not set a universal pass value for every pouch.
Leak and integrity testing Test method appropriate to the pouch construction and product risk. Ask which method is used, how samples are selected, and how results are recorded. ASTM F1929 is a dye-penetration method for porous medical packaging materials; ASTM F2096 is an internal pressurization bubble-leak method. Choose a method suitable for the package and application. A test result is meaningful only with defined sample preparation, test conditions, and acceptance criteria.
Film and material testing Mechanical properties and consistency of the specified film structure. Request a material specification or relevant test report. ASTM D882 covers tensile properties of thin plastic sheeting, including film. Use test results to compare material against an agreed specification; the test method itself does not establish a universal minimum performance level.
Production controls Incoming-material checks, in-process inspection, finished-pouch checks, and lot traceability. Ask for the inspection plan, defect classification, sampling approach, and lot identification method. Agree in advance on critical defects, acceptable quality limits or other sampling rules, and the corrective-action process for nonconforming goods.
Commercial and delivery terms Minimum order quantity, unit pricing, setup charges, production lead time, and repeat-order terms. Request a quotation based on the same dimensions, structure, print coverage, order quantity, delivery destination, and delivery terms. MOQ, pricing, and lead time vary by supplier, print process, and specification. Compare written quotations rather than relying on general market estimates.
Suggested comparison score Rate each supplier from 1 (weak) to 5 (strong) for specification fit, documentation, sample quality, testing, communication, and commercial terms. Record evidence beside each score and flag any unanswered compliance or performance question. Use the same criteria and weighting for every supplier. Treat unresolved food-contact, product-fit, or seal-integrity questions as approval blockers, regardless of the total score.
Before approving production: approve the final artwork and pouch specification, confirm the intended product and market, document test methods and acceptance criteria, and retain an approved reference sample.